
I often get asked by parents if I have a recipe to replicate the very popular sandwich thins you can buy in the shops. I’m not sure why I haven’t thought of it myself since both kids love them, but it had never occurred to me.
After the last request I decided it was high time I had a recipe. Of course mine doesn’t have any of the added ‘nasties’ that you often find in the bought versions so they are perfect for those wanting to eat a more natural diet. They also cost a lot less given that the 4 sandwich thins that we buy cost £2 and these will cost you around £3 for 10.
As you know I’m trying very hard to avoid all grains at the moment to deal with my hormone imbalance, but trying to develop recipes and avoid grains is proving tricky. I can therefore attest to the fact that these are rather yummy.
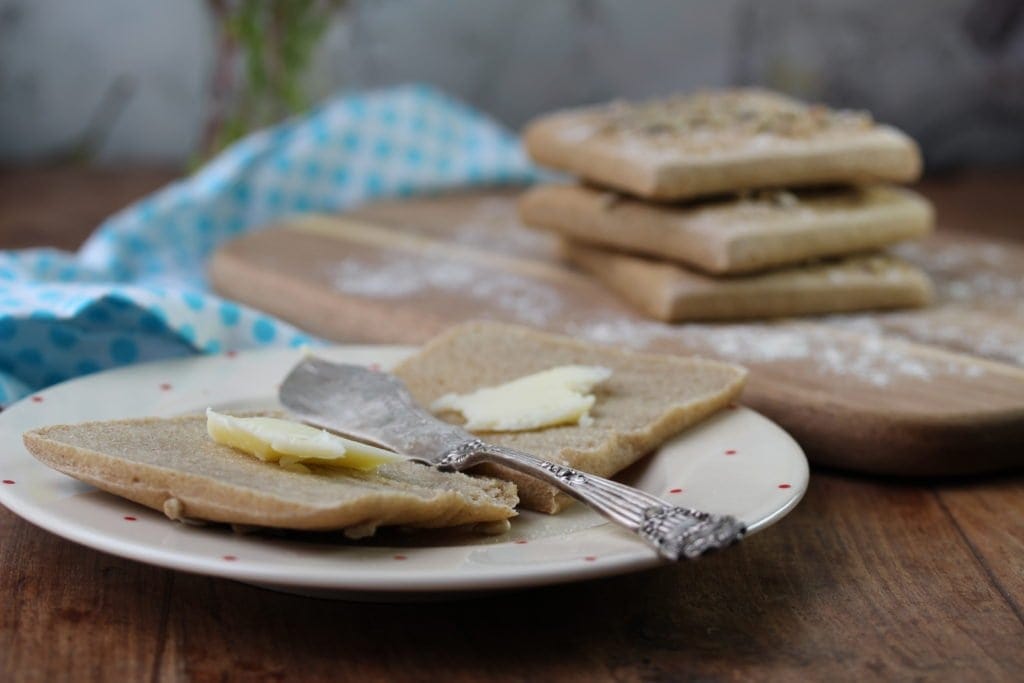
Please be careful when you slice them open. I don’t want to be held responsible for any blood or finger loss. I suggest pressing the square into the chopping board with the palm of your hand and then, holding the knife parallel with the square slicing across ways, rather than trying to cut the thin like a piece of bread which is bound to lead to disaster.
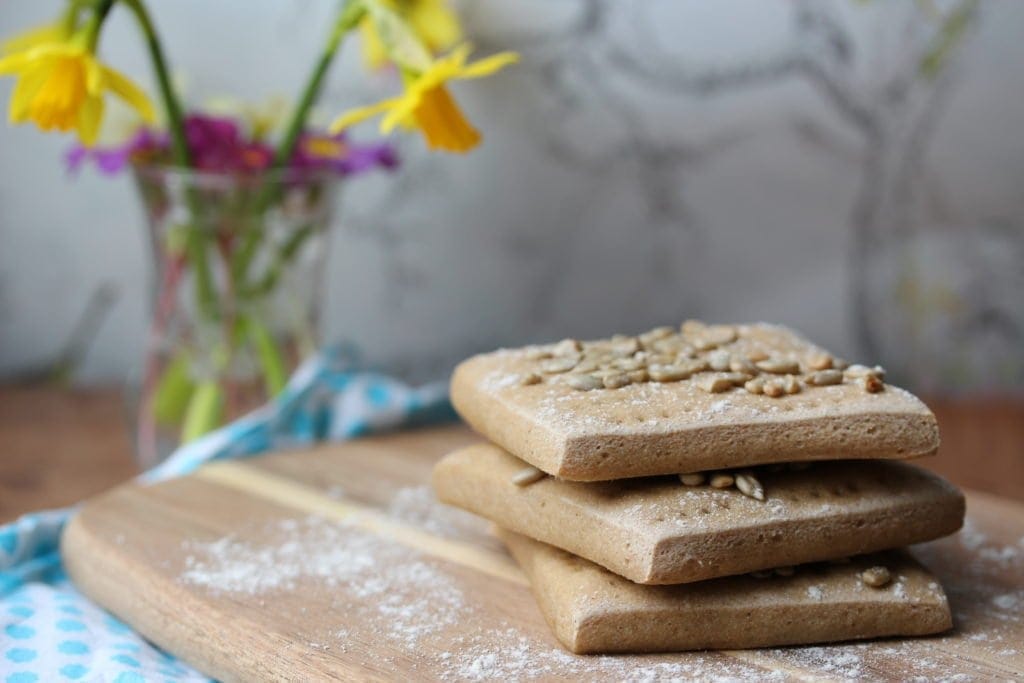
Add seeds or grains to the top of your thin if you want to add more protein to the bread. I don’t suggest you add it into the dough itself as this may prevent the thin from rising as well.
It appears that my bread book recipes will soon all be on my website. Hey ho! If it helps to encourage you to buy my flour and bake more wholesome free from bakes then I’m happy. Just make sure you tell your friends!
In the meantime if you have any special recipe requests then please do let me know. The latest request I’ve had is for Hot Cross Buns. You can find my low FODMAP, dried fruit free recipe here. I’ll create a more traditional recipe in the coming weeks.
Happy baking.
Wholegrain Gluten-Free, Dairy-Free, Egg-Free Sandwich Thins
Ingredients
- 300 g Plain Free From Fairy gluten-free Flour
- 50 g potato starch
- 1/4 tsp sea salt
- 1 1/2 tsp psyllium husk powder - or 2 tsp xanthan gum
- 1 tsp easy bake yeast
- 1 tbsp olive oil
- 250 ml warm water
- Optional seeds and grains such as sunflower - linseed, millet and poppy for top
Instructions
- Place the flours, salt and psyllium into a bowl and mix well to combine
- Add the yeast and mix again to combine
- Finally add the oil and warm water (this should be around body temperature)
- Mix vigorously to combine into a dough
- Knead the dough in the bowl until lovely and smooth
- Using a piece of non-stick liner, scatter the liner with a little flour and place the dough on top
- Roll the dough out into a square measuring around 26cm across and 1/2 cm thick
- Using a ruler measure 8cm squares onto the dough and cut them out. You will have some leftover dough from the edges. Knead this and roll into a rough final square
- Gently place the squares with gaps between them onto a couple of baking trays lined with more non-stick liner
- Scatter a little water on top and place in a cold oven with a tray of boiling water in the bottom
- Leave to rise for around 30 minutes
- Remove from the cold oven and turn the oven on to 180 degrees c/160 degree fan/gas mark 4, leaving the tray of water in the oven
- While the oven is getting up to temperature gently spear the top of each thin with a fork (don't go all the way through, it's just for decoration)
- Moisten with a little more water and scatter with seeds and grains if using, gently pressing them into the dough
- Bake for around 20 minutes until firm
- Freeze any left over and refresh in the microwave before eating
If you are wondering what non-stick liner I use, or what psyllium powder to buy visit my Vicki Recommends page.
Pin the recipe so you don’t lose it:
I shared this with:

Rayz says
Maybe I’ll going to try this on the weekend. I really love to try this. Thanks for sharing!
Vicki Montague says
You’re welcome. I hope you enjoyed them.
Dawn Louise says
Hiya, I definitely have to make these, can I substitute potato starch for cornflour?
Vicki Montague says
Hi Dawn, I should think that will be fine! Let me know how you get on.
Elaine Savage says
I’ll practise my shaping technique! I’m wondering what effect is produced by the sprinkling of water on the thins, and the tray of water during baking? It’s a great recipe.
Vicki Montague says
Hi Elaine, steam helps to keep the crust soft which enables more rise and I find by sprinkling the water on the bread this also helps with softness. You can read more here..https://www.thekitchn.com/food-science-tip-add-steam-whe-76586
Elaine Savage says
How fascinating, thank you for your reply.
Elaine Savage says
Yay, I have made these and they are delicious Vicki. I’m so pleased to have something to use as a free-from sandwich which doesn’t fall to pieces. Unfortunately mine are not as even or professional looking as yours but I’m still very happy
Vicki Montague says
Hi Elaine, great to hear! A bit of practice and they will look every bit the same as the ones from the shops. The best thing is you know what you’re eating!
Becky says
These look amazing Vicki!!
Vicki Montague says
Ah thanks Becky! Are you well?
Mel says
You’re an absolute genius! These sandwich thins looks absolutely perfect, and I love the fact you’re thinking about your readers’ health and safety! I’m pinning these babies now so I don’t forget to give them a go. Thanks for joining in with #FreeFromFridays. xx
Vicki Montague says
Readers always come first Mel ;)!
chloe says
Hi, These would be great as a snack and stop me eating the wrong thing things. I shall give this a try with some added seeds, Chloe #freefromfridays
Vicki Montague says
I hope you enjoy them!
Eb Gargano / easypeasyfoodie.com says
What a fab idea, Vicki – they must be about a zillion times healthier than the shop bought ones!! Eb x
Vicki Montague says
I’m sure you could easily make them with ‘normal’ flour…